Monday, July 29, 2013

Geometry: Properties of Circles with Paper Folding

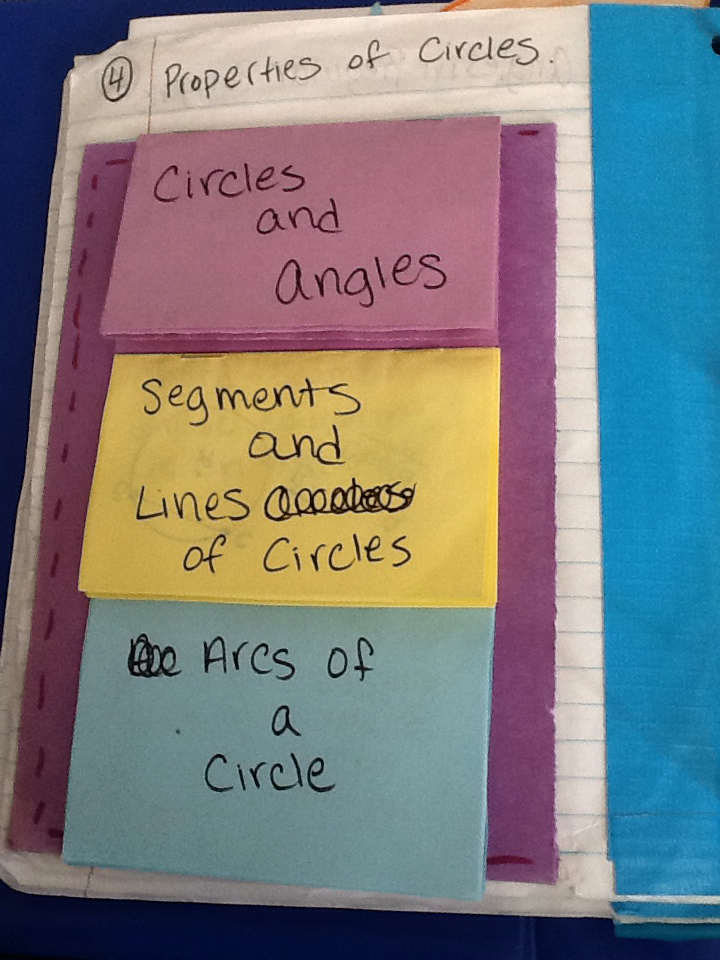
Pg 4. Properties of Circles

We began with taking a half sheet of construction paper and glueing down a pocket. The pocket is used for the three paper folding diagrams we created for the terminology. Next we took three quarter sheets of paper and stapled them together like a magazine to create mini books. (We glued each one down after we completed it.)

I find all the properties and relationships of circles to be quite overwhelming. I decided to take these next few journal pages slow and make them as hands on as possible. I learn so much from my students that much of the written statements are conclusions students made.

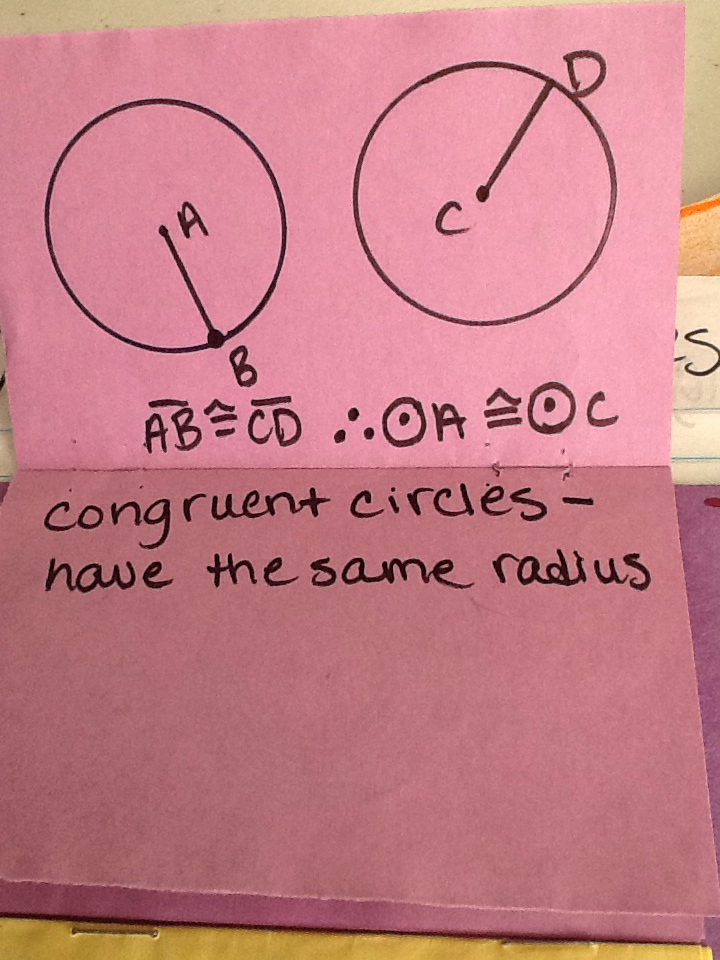
With each term that could be applied to a paper fold, we used a printed circle to apply the term. There is a printed circle page for each mini book.

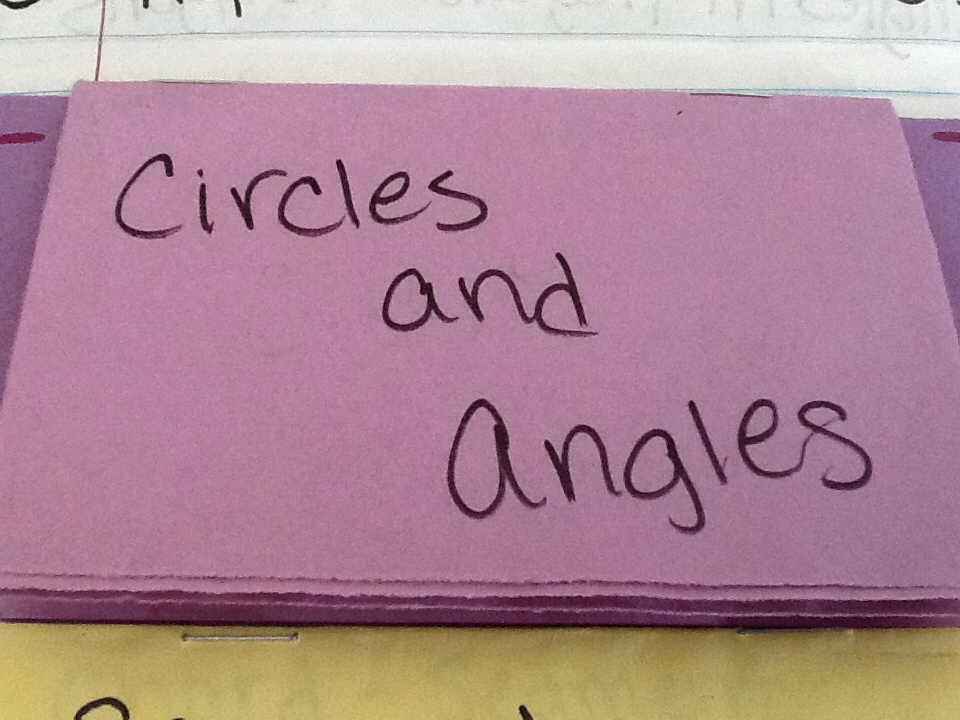
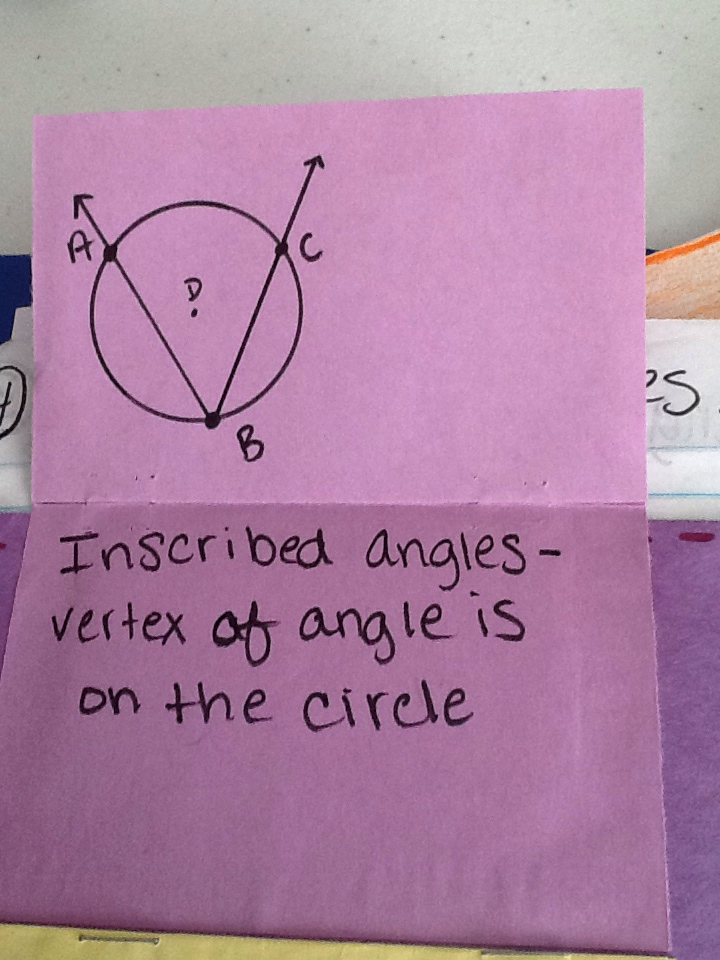
Mini Book 1: Circles and Angles

We used a compass to construct the circles for each term.

The original definition did not include equidistant. It used 'equal distance', but my student love their new word 'equidistant' this year.


:) Student's conclusion and addition: Concentric circles and all circles are similar! I never realized this detail. I cherish it now.

When I remember, I try to always identify and notate a term within the diagram.


Here's the first folded circle. We began with folding the circle in half to identify the center. Point out that the center of the circle doesn't have to be found with perpendicular diameters. It's a go to strategy for most people and can build a slight misconception.

After the center was identified, we located two points ON the circle and drew a central angle. Next, we located a third point ON the circle and drew an inscribed angle.


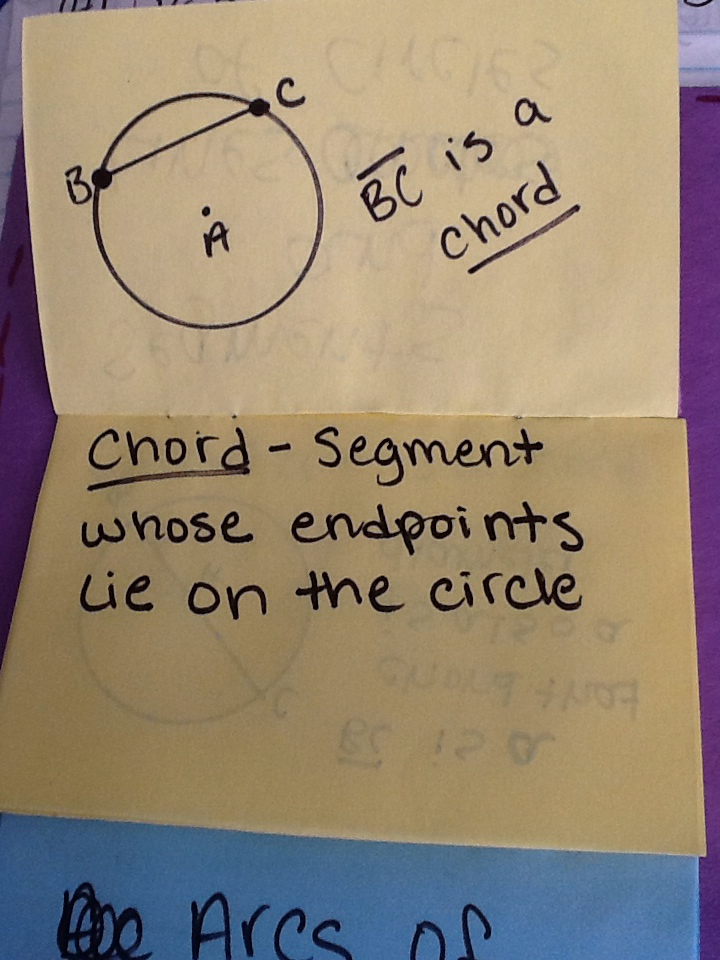
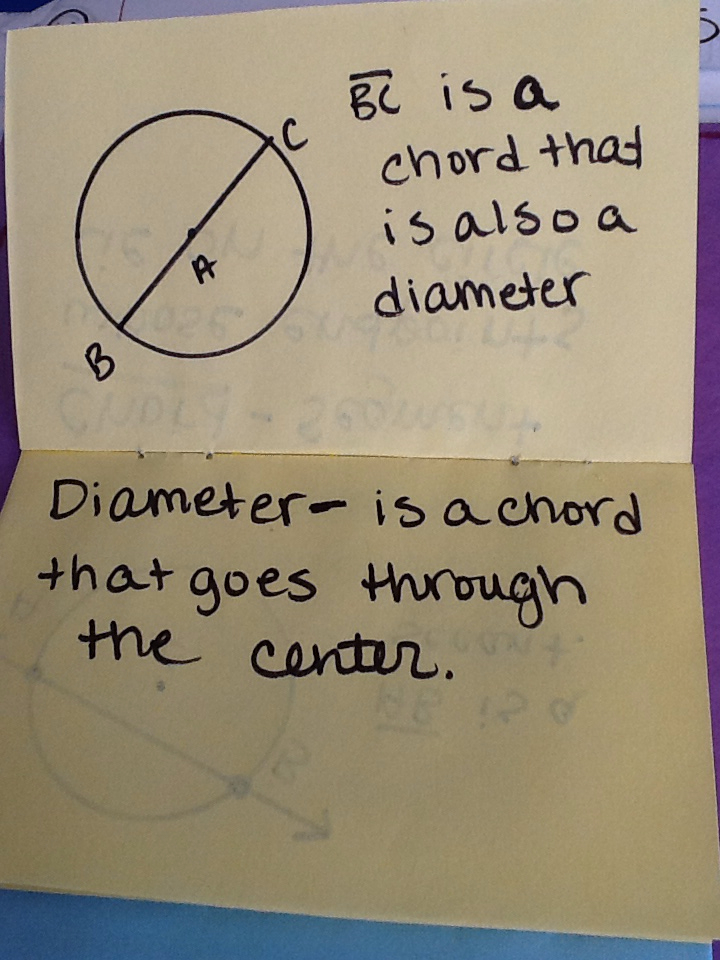
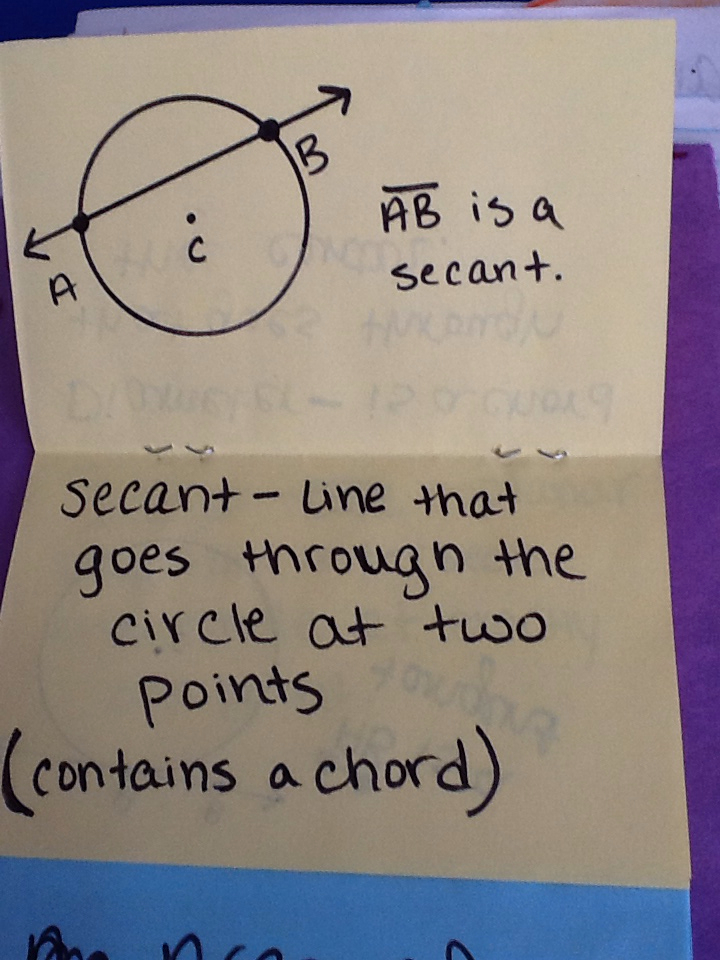
Mini Book 2: Segments and Lines of Circles


At this point, if I didn't initiate notating the term in the diagram, the students would prompt me on it.

I tried to make a fold for each term to make it more hands on. The paper folding was the favored part of this journal page.

Mini Book 3: Arcs of a Circle


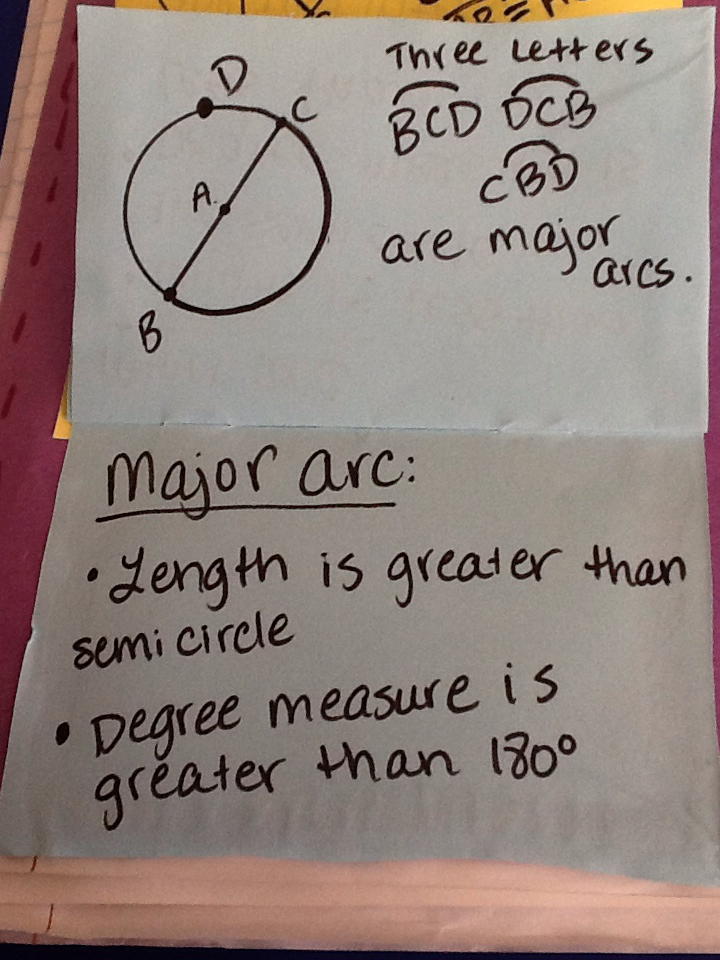
I like this journal page. I learned a lot from my kids!!


Sunday, July 21, 2013

Geometry: Polygons and Angles in Regular Polygons,

I heavily relied on the CSCOPE curriculum, End of Course prep book, and online resources to guide me through this unit. This is my first year to get this far journal wise and thoroughly teach properties of two dimensional figures.

Pg 1. Unit 7 Properties of Two Dimensional Figures

When I get the whole Youtube thing figured out, I will try and share some paper-folding lessons I've learned in workshops and used in my classroom. They strongly support the unit on two dimensional figures and they are fun!!

Pg 2. Polygons

This is an unusual foldable, but I love how it organizes the concepts I'm trying to get over to my students. It's folded into fourths. The right side is folded two times into itself and the the left flap folds over top to the right. (Sorry if this explanation is terribly confusing; hopefully the pictures make more since.)

Again, there's some gray area as far as complex polygons go, and I informed my students as such. Any opinions or suggested resources, please share.

Next year, I plan to use color to compare corresponding categories.
Complex vs Simple
Concave vs Convex
Irregular vs Regular

Pg 3. Angles in Regular Polygons

I enjoy teaching this lesson because students need multiple ways to determine angles and experience deriving the formulas from building patterns.

We started with a large polygon on the front and illustrated what is considered the interior and exterior angle. Next, I asked them to make a conclusion based on what they know. They concluded that the interior and exterior angles are supplementary! We added that statement to the top. We then went to the inside and completed the gigantic table to derive the formulas. We finished by writing the important formulas and ideas on the front inside the large polygon.

Students struggled with remembering the formula for the measure of an interior angle. They found another way - determine the measure of an exterior angle (easy), and subtract the measure of exterior angle from 180 to determine the measure of the interior angle. A much longer process (to me), but I was so excited that they could figured an interior angle measure out based on concrete prior knowledge.


Saturday, July 20, 2013

Venn Diagrams: Quadrilaterals and other Polygons

These activities are AWESOME! I love the discussions that come up, the type of thinking that occurs, and the multiple possibilities there are.

These materials were provided through a workshop. I have yet to use them in my classroom, but I have no doubt these would be an excellent addition to the unit of quadrilaterals.

You start with four different Venn Diagrams.


You have a selection of set titles and shapes.

Here are some examples of the use of these materials.

(Don't forget about the universal set on the outside of the circles.)


Some suggested strategies/conversations:

  • Have a student demonstrate their Venn Diagram.
  • Have students justify their decisions.
  • Start with with set titles and categorize shapes.
  • Start with categorized shapes and determine the set title.
  • Ask students where they started and how they categorized the shapes.


Quadrilaterals Project From My Second Year

My secret.... Sometimes when I'm not sure where to start, I go to my students. My second year of teaching, I got to the unit of quadrilaterals and had no idea where to start. I decided to assign an exploratory based project to my honors class and see what turns up.

Objective: Students design and create a graphic organizer on the topic of quadrilaterals.

It began as a very open project and resulted in some unique results. I gave them several days to research, design, and produce their graphic organizer. We used a round robin strategy to evaluate and rate the graphic organizers on display. After this, the students were to choose a graphic organizer and complete one of their own for their journal containing the generalized information of the class.


The following are student products and may contain copyright violations and incorrect information.

1. Multi Shutter Fold within Large Shutter Fold

This was by far the most creative and the inspiration for the Properties of Quadrilaterals foldable I now use.

2. Basic Half Page Book Fold

3. Shutter Fold
4. Shutter Fold
5. Half Page Book with Post-it pop ups
This student is one that always makes me smile-unique, challenging, and brilliant. His graphic organizer turned into "what is not a quadrilateral" and I think he enjoyed exploring other shapes more. He used post-its to summarize/justify why the shape is not a quadrilateral.
6. Attribute Pop-up
This graphic organizer is great!! They drew individual quadrilaterals and added pop-ups for definitions. Not overly organized, but I still like it.
7. Trifold Computer Generated
8. Half Page Book
I don't know how I feel about the quadrilateral web, because it depicts a parallelogram as being a subcategory of a trapezoid. That was another gray area topic. It was a good conversation to listen to when the kids evaluated this graphic organizer.
9. Half Page Book
10. Layered Flip Book
 

I collected the above graphic organizers, combined some styles that I liked, and produced the following graphic organizer that I used this past year. I am always still working on facts and information. So if you have any critiques or suggestions, please comment.


The second half of the project consisted of an essay.

Options:

  • Write two full pages analyzing the attributes and relationships of quadrilaterals.
  • Depict the attributes and relationships of quadrilaterals using fiction.

I ended up with quite a bit of plagiarism which was a violation of the course syllabus and resulted in failing grades and reprimands.

However, the best result is the relationship a student told of a rectangle and a rhombus. "Rectangle and Rhombus stayed out late one night, and nine months later they had Square."


EXTRA: This is my first quadrilateral foldable experience from a journaling workshop.